

One way IndigoCCR distinguishes itself from other reward apps is through its easy implementation process. Merchants have the option to call or email IndigoCCR’s support line and receive a guided consultation or complete implementation themselves with the assistance of the Setup Dashboard.
The Setup Dashboard guides you through implementation by tracking your progress and outlining key areas to be addressed by the merchant so their loyalty program runs successfully. Subjects include Company Details, Communications, Text2Join activation, Branded Website, Rewards Program, Redemptions, Automated Communications, User Access and Billing.
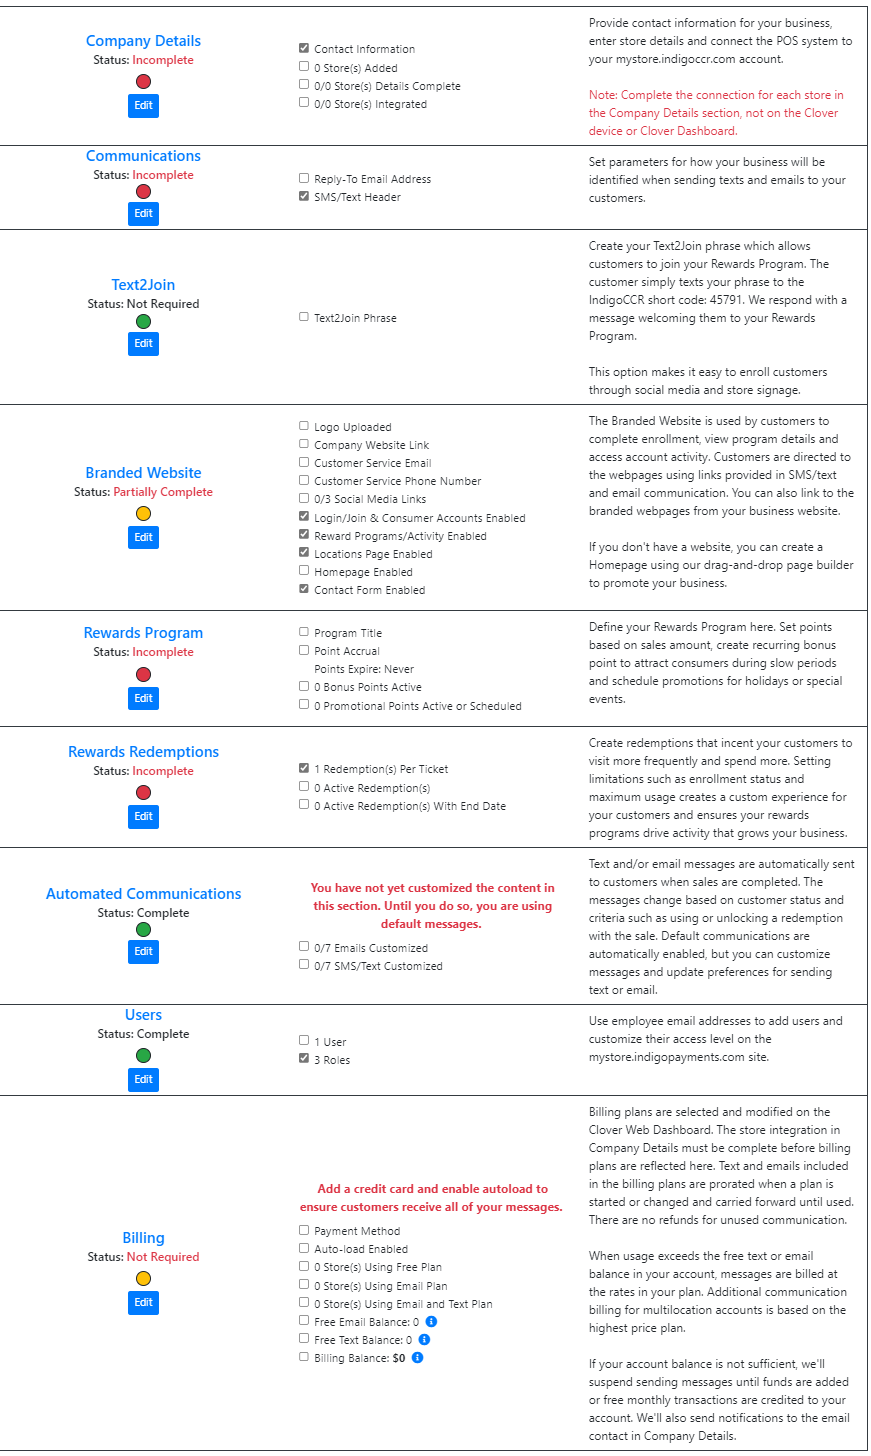
In order to begin using your IndigoCCR program the Setup Dashboard must be completed. Green marks complete, yellow marks partially complete and red marks incomplete. If any area is marked red, IndigoCCR will NOT be active on Clover even if it is downloaded and connected on the Company Details page. IndigoCCR will become active once all areas are marked either Complete (green) or incomplete (yellow).
Company Details
The Company Details page is where you add your business’s basic information – Company name, address, phone number, and email. This is also where you connect your Clover POS and add stores if your business has multiple locations.
To connect your Clover POS, simply add your store and you will be redirected to the Store Details page where you will see instructions for POS integration. Note: An Admin login for the Clover Dashboard is required to integrate.
Communications
The Communications section is where you define your Reply-to email address and your Text Header. Emails sent from the IndigoCCR platform contain an email address where replies are routed. When your customer replies to an email sent from the IndigoCCR platform, their message is sent to your Reply-to email address, which should be your customer service email. If you don’t use email, enter noreply@indigoccr.com and your customer will be advised the email box is not monitored and asked to contact you another way.
The SMS/Text Header is displayed before every text message that is sent on the IndigoCCR platform. Select a header with your business’s name so your customers will recognize your text messages.
Text2Join
Text2Join allows customers to join a loyalty program instantly by texting a short phrase created by the business owner.
Most merchants use a nickname or other meaningful word to the business without special characters. The customer simply texts the phrase to IndigoCCR’s short code: 45791. We generate a message welcoming them to the Rewards program.
Text2Join makes it easy to enroll customers through social media and store signage. Customers can join while waiting in line or from anywhere at any time, without assistance from the business. Also, there is a zero chance of data entry errors since it’s sent from the phone number of the participant.
Branded Website
The Homepage Builder allows you to build a homepage using a “drag-and-drop” method. You can add rows for content, pictures, menus, and link your social media and customer service to the site. If you don’t have photos of your own, you are provided a free selection of stock photos to choose from.
You can display multiple locations, enable login/join & consumer account preferences, display details about point accumulation and reward redemptions. You can even create multiple homepage templates that you can edit at any time. While editing, you can preview your site on desktop or mobile view.
Rewards Program
Where you define your rewards program by adding a Program Title, Points Awarded per $1 and Point Expiration. This page is also where you schedule bonus point windows during the week and promotional points for holidays or special events.
Rewards Redemptions
Where you create redemptions to reward customers to encourage repeat business. To learn more on how to create redemptions visit the following articles:
Automated Communications
Automated Communications are triggered when customers complete a sale. The messages vary based on the action, such as enrollment completion, transaction from a returning customer, unlocked redemption, redemption used, and more.
Default messages are automatically enabled upon setup, but you can customize messages and update preferences at any time.
Users
Add employees by adding users, manage roles and edit Access Levels.
Billing
Define your billing plan, check your message balances/history, and load funds to continue sending messages in this section.

